HERE’S WHAT YOU’LL NEED
Heavy card stock paper- Lt. pink, white & cream
Ribbon, Mocha brown- 1″ wide x 12″ long
Ribbon, Mocha brown-1/4″ wide x 8″ long
Scrapbook tape roller or double sided tape
Foam adhesive dots
Decorative & regular scissors
Ruler
Small black easels
HERE’S WHERE TO GET IT
Your local craft and scrapbook store should have everything you need.
HERE’S HOW TO MAKE IT
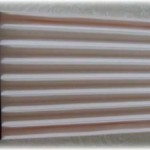
1. Cut all paper at together, to save time. Cut 2, 3 1/2″ x 2 1/4″ & 2, 21/2″ x 3 1/4″ pieces of white card stock paper using decorative scissors.. After printing table number and menu on cream colored card stock, cut them to, 3 1/4″ x 1 1/2″ using your regular scissors. Use 1 sheet of Lt. Pink heavy card stock paper for each table # . Fold back and forth, like a fan.
2. Tape down larger pieces of white paper to fan folded paper, 2″ from top and bottom, using double sided or roller tape to hold in place.Place foam dots in center of white paper and place smaller white paper on top of dot. This will give card a dimensional look. Tape menu to bottom white card & table number to top white card.
3. Glue or tape 1/4″, ribbon tied in a small bow, to right (top card) and left (bottom card) sides of white paper.
4. Cut and wrap ribbon around fan folded paper, to back side, 1″ from bottom & top of fan paper and secure on back of fan paper, using the double sided tape.
5. Place each table fan card in a small black easel and place on each table.


